Monstera plants are amazing, large leaf plants the make quite the statement! One of the best things about them is they’re easy to propagate and share with your friends. Today we’re going to share exactly how to propagate a monstera plant.
We’ll be walking through propagation by cutting (both in water and in soil), propagation by separation and propagation by air layering.
Table of Contents
About the Monstera
Monstera plants are a topical plant. They’re found in the rain forest of Mexico, South America and Central America. Monstera Deliciosa and Monstera Adansonii are two amazing types of monstera.
There are 48 total types of Monstera plants but these are the 2 most common ones (and the 2 that I personally own!).
Monsteras come by many different names – most commonly called the Swiss Cheese Plant. It gets this name due to the round holes found on their leaves!
In nature they’re found in the rain forest. The holes in their leaves allow light and rain to get to the bottom part of the plant so the whole plant is healthy.
Paisley Plants is a participant in the Amazon Services LLC Associates Program, an affiliate advertising program. This post may include affiliate links which means I may earn a small commission if you shop using the links below at no additional cost to you.
Why Propagate Your Monstera
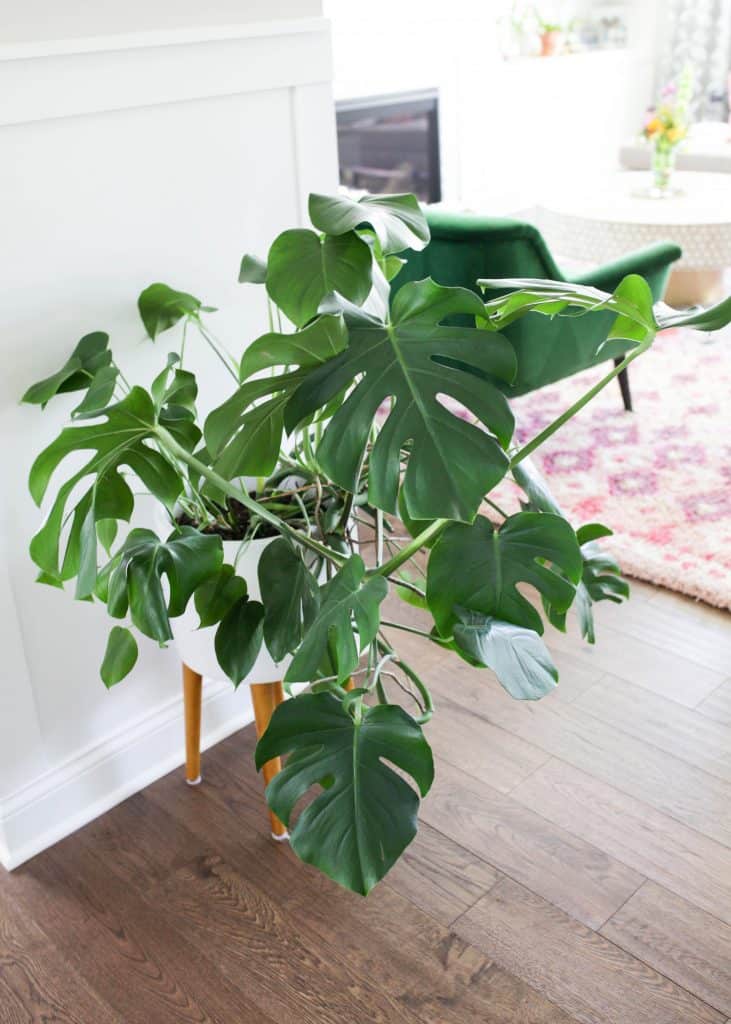
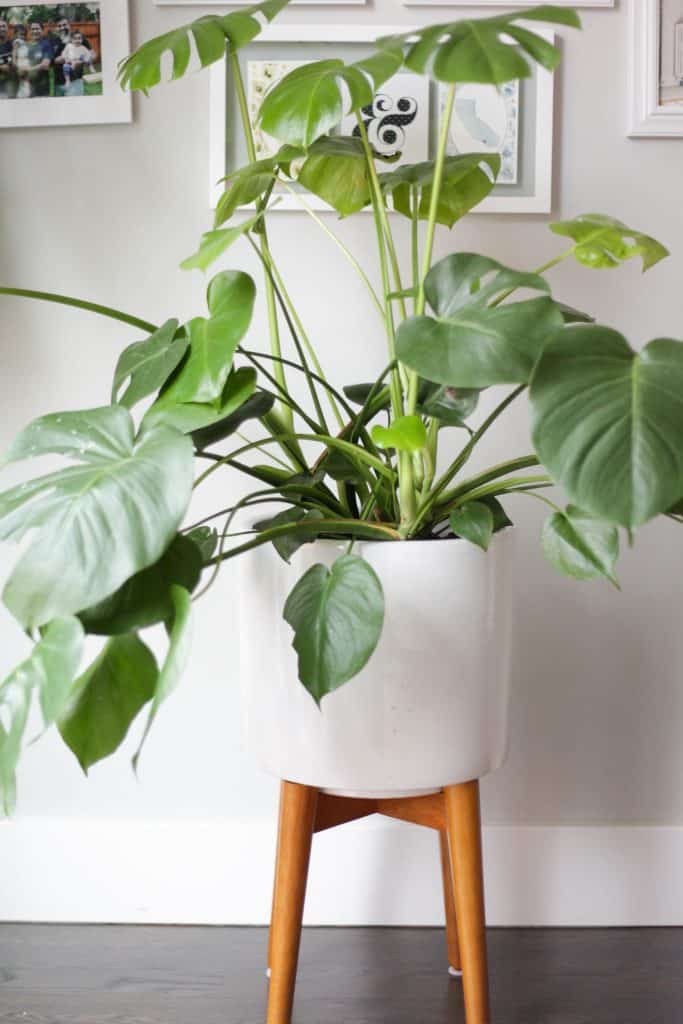
You’ll quickly notice that your monstera plant can grow quickly and become quite large. Propagating your monstera can help it to not become overwhelming in your home!
If you prefer a bushy monstera, this is also a great way to keep it more bushy and less of a taller, climbing plant. There will also become a point when you run out of trellises or moss sticks and it has nothing to cling to to keep climbing (more on that at the bottom of the article)!
You might be worried about your plant not growing any more after propagating but that’s the great thing about plants. Propagating actually encourages new growth! You’ll see new growth happening near the site where you cut it. It’s an amazing process.
And the best part about propagating? You can share your clippings with friends or family! It’s the gift that keeps on giving.
Now let’s get to the fun part – propagating!
There are a few different ways to propagate your monstera. First, we’ll discuss propagation by cutting.
Propagation by Cutting
We’ll start with what I personally think is the best way to have good luck propagating your plant with success – and the easiest! Propagating by cutting is the way I always propagate my monstera plant.
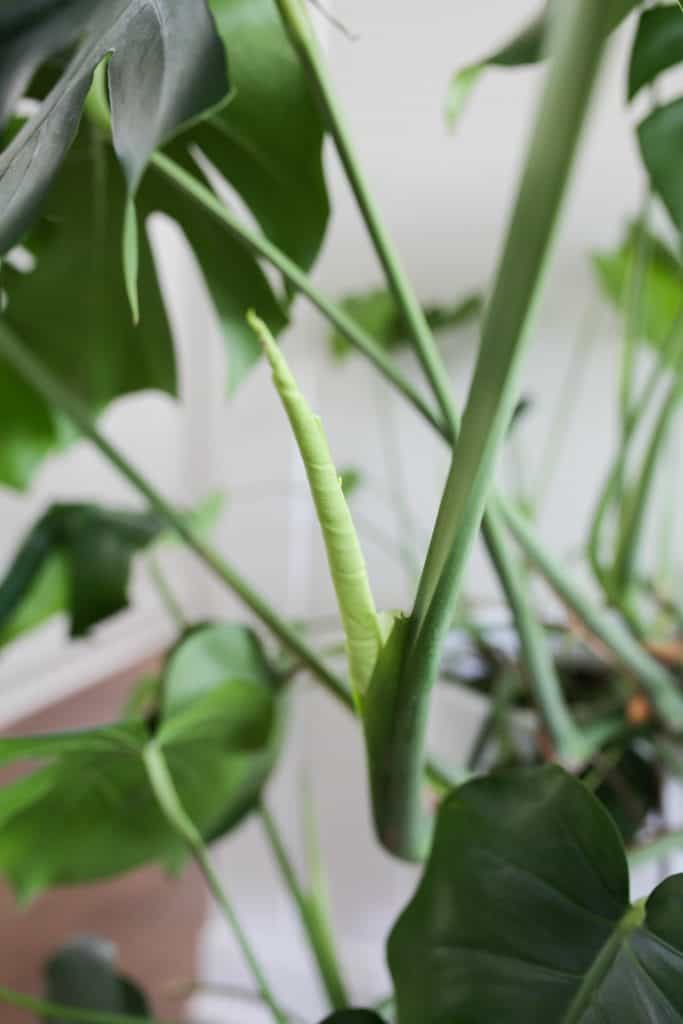
1. Find the node
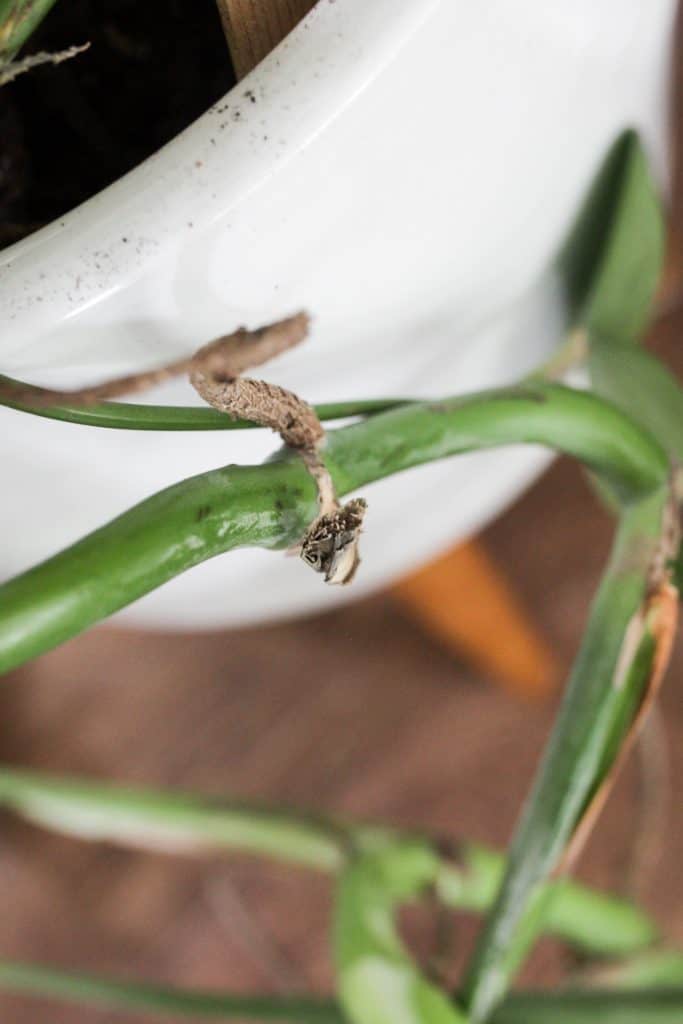
The first step in the propagation process is you’ll need to find the node. The node is just a little brown bump coming off of one of the stems. This is where the roots will form. Without one of these nodes, you’re monstera clipping won’t be able to form roots.
You can also use a piece of stem with just an aerial root. Roots can also form from the aerial root! Just be sure that your clipping has either a node or an aerial root. Cutting just the leave without one of these will make it so your clipping can’t produce roots.
The piece of stem that you cut should also have some leaves on it. Ideally, I like 3 (usually the bottom leaf will be cut off leaving just 2). This will depend a bit on the plant you’re cutting from!
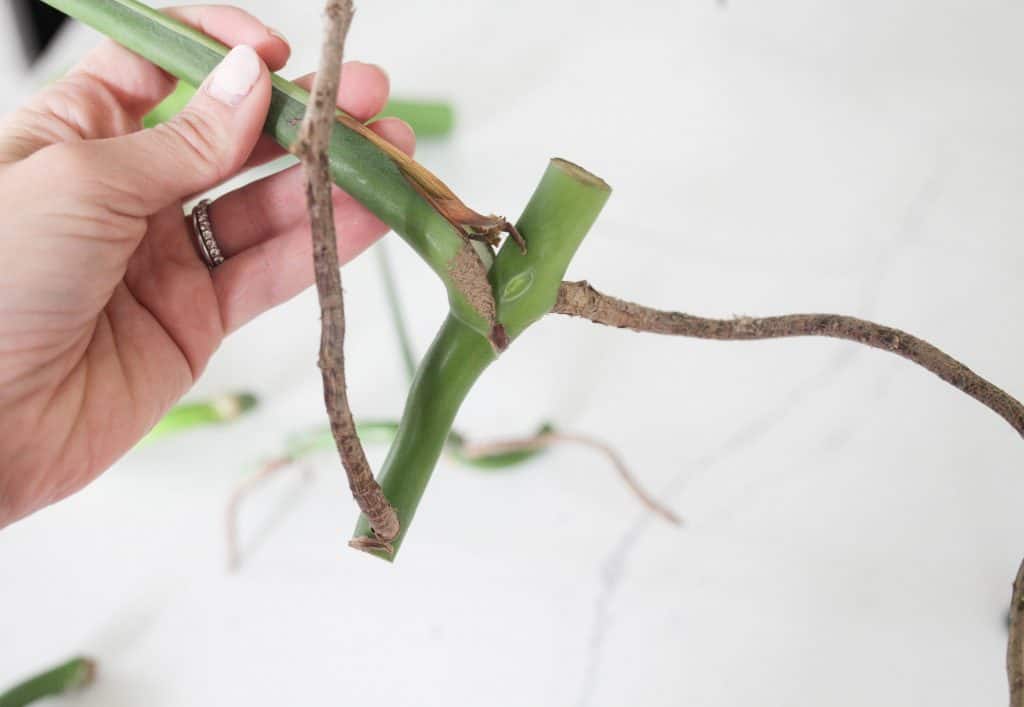
2. Cut the Stem
Using a sharp knife, shears or scissor (all depending on the size of your stem), cut the stem from the mother plant! Like when you cut flowers, make a cut at a 45 degree angle. This will help encourage the clipping to soak up enough water to produce roots.
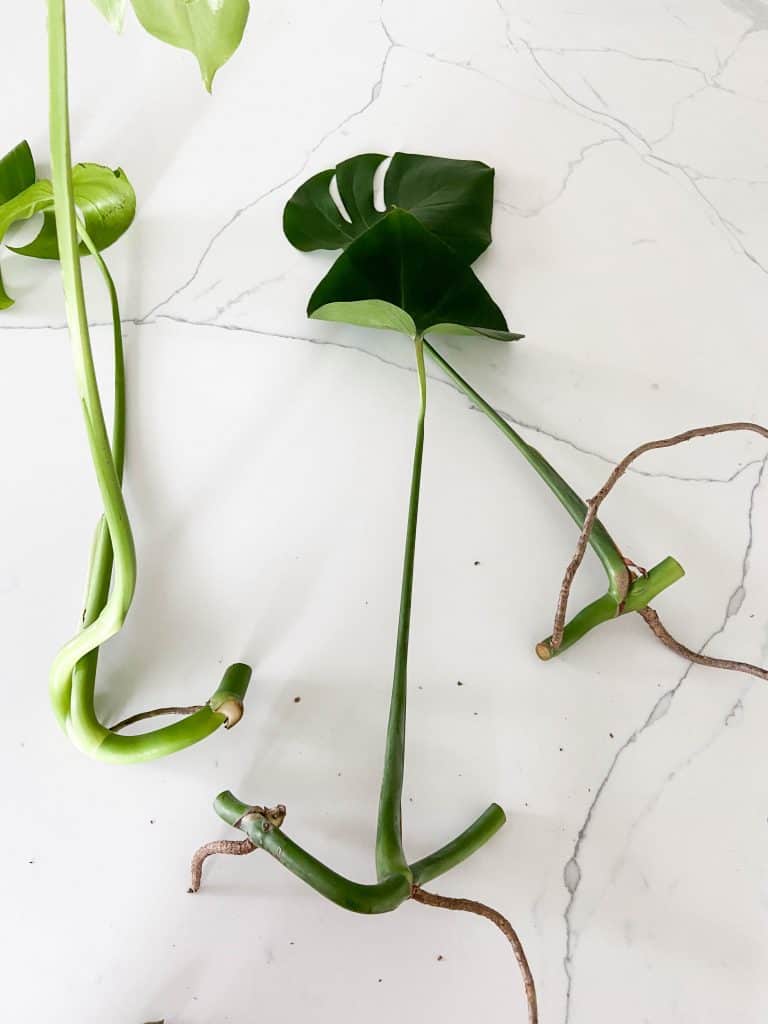
You’ll also want to potentially trim off the bottom leaf or the stem cuttings if the base of the leaf is below the node. If there’s no leaf base below the node you don’t need to trim any off.
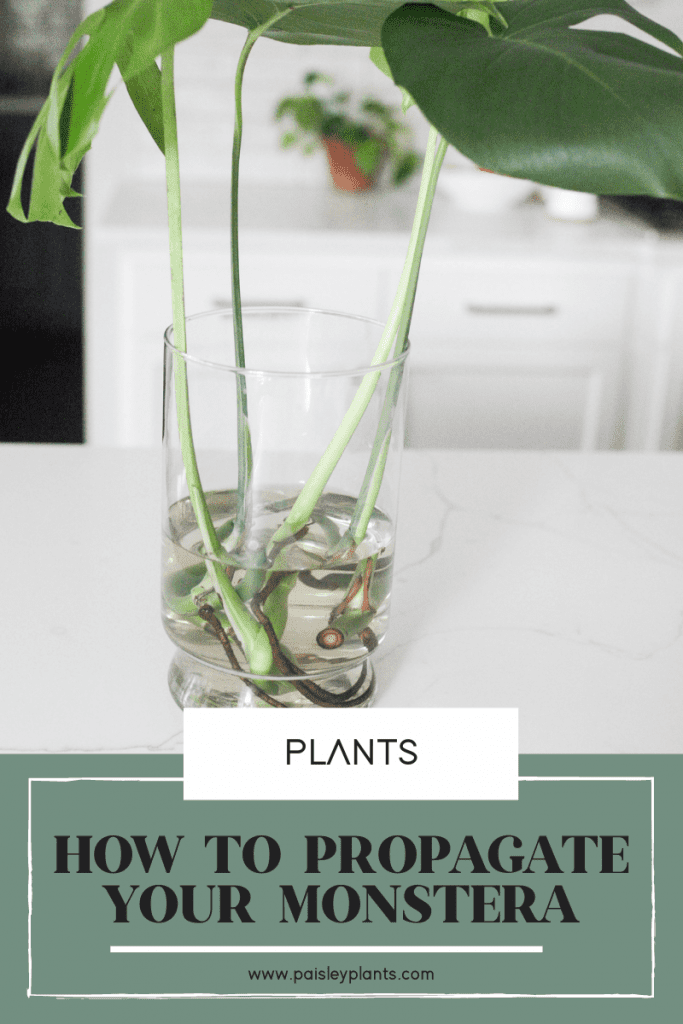
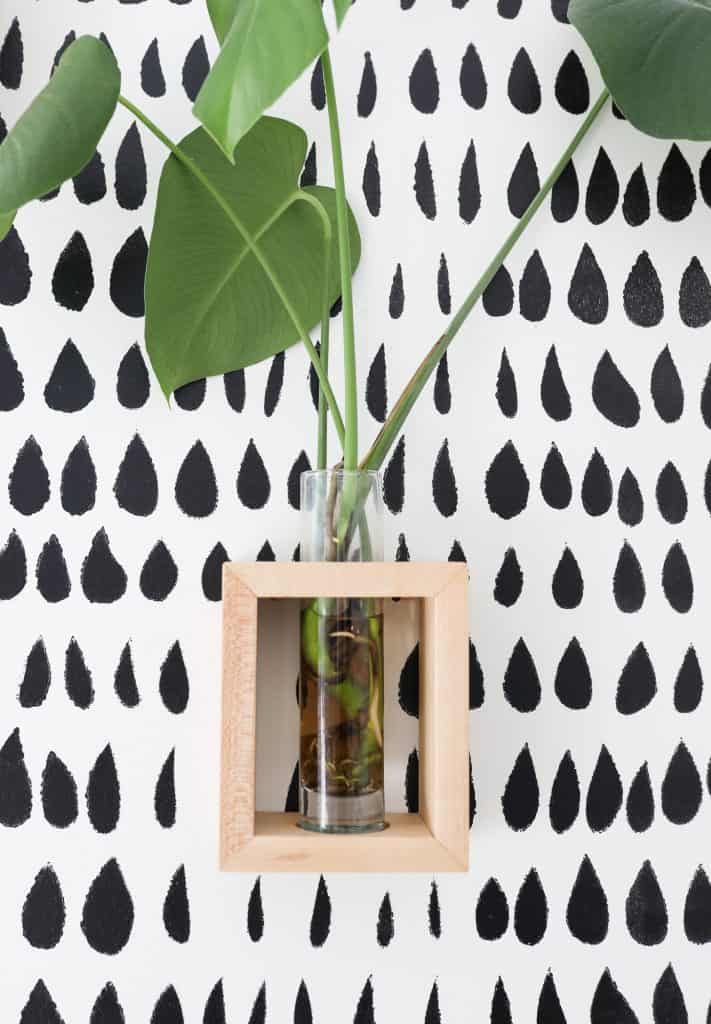
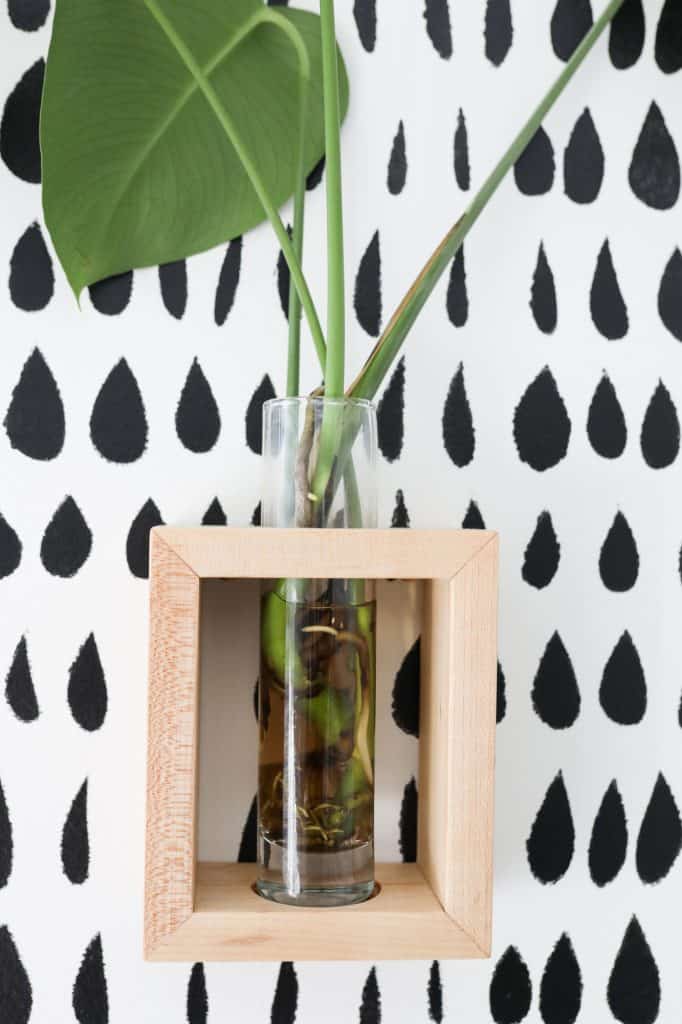
3. Place the Clipping in Water
There are 2 options for what to do next. You can either place your monstera cuttings in tap water or in soil. I prefer water propagation because I like to make sure that my roots are forming! It’s a much easier way to keep an eye on what your plant is doing.
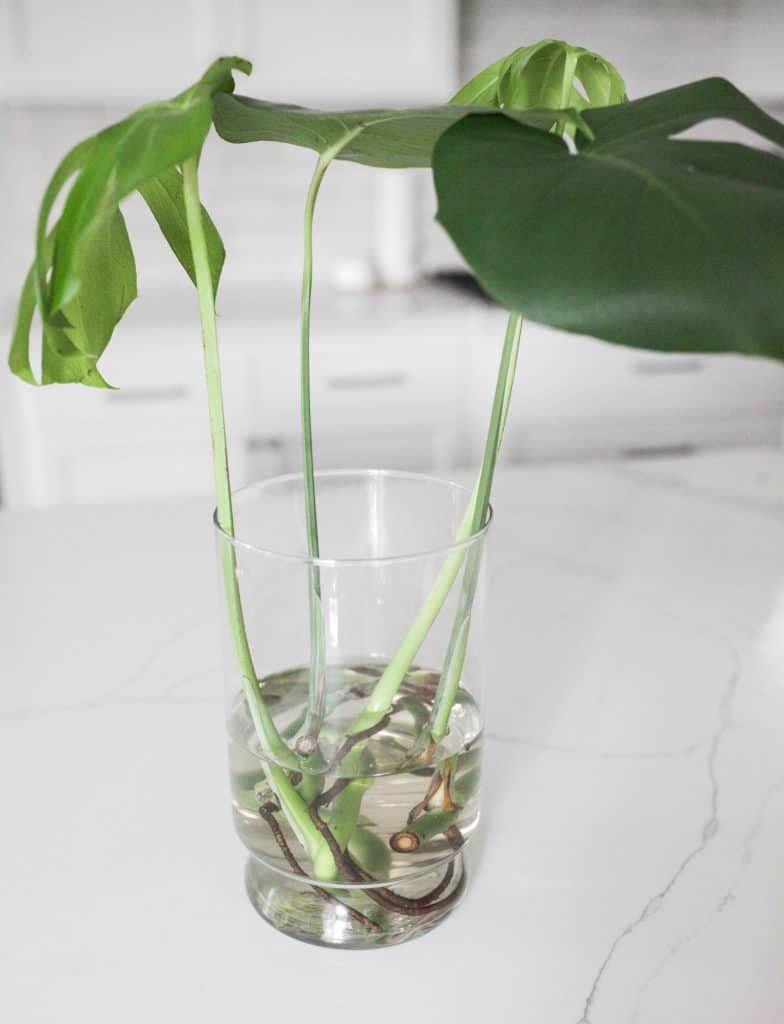
All you need to do is fill a vase, jar or propagation station with room temperature tap water. Even a simple glass of water would do!
I’ve found that you need to use a tall skinny vase to keep your clipping upright. Then place your new cuttings in the water, ensuring that the nodes are covered up by the water. If the nodes aren’t covered by the water, you’ll have a hard time forming roots so be sure those are always covered.
Keep an eye on your water and change it out every week or two or whenever it begins to look a little gross. Fresh water will encourage healthy roots!
Be sure to place the clippings in indirect sunlight, not direct sun. Monstera plants don’t like bright sunlight so keep them away from that even while propagating.
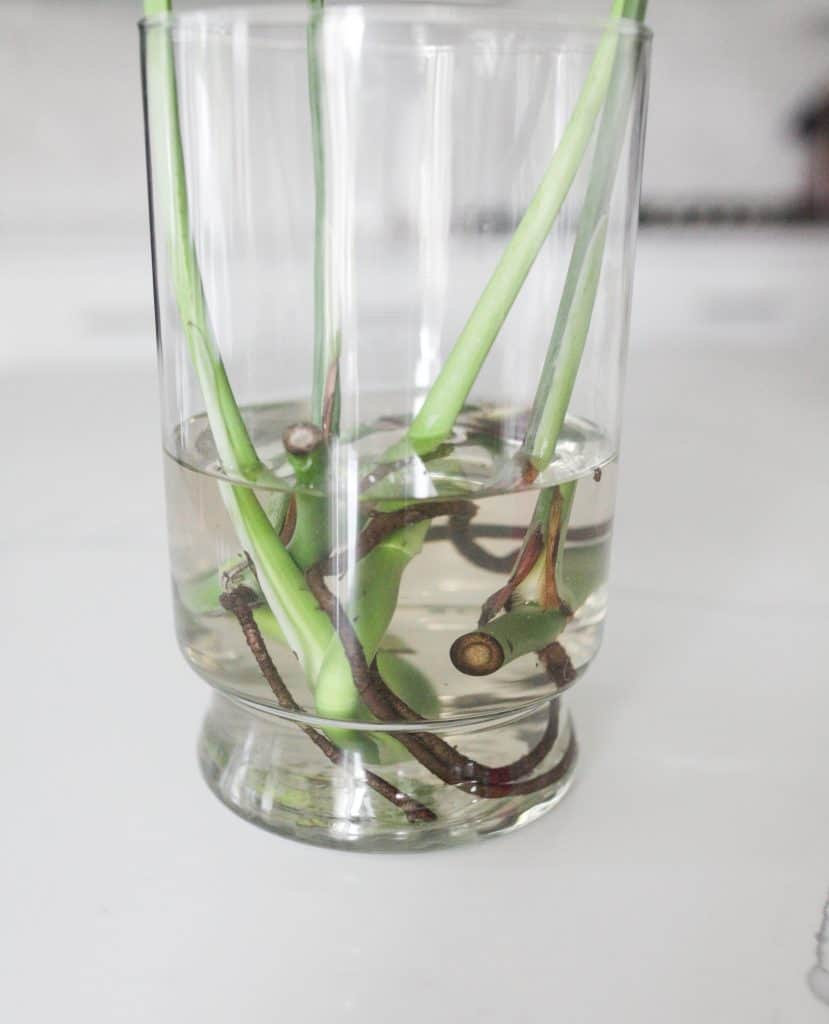
After a few weeks, sometimes up to a couple months, you’ll start to see little roots form! Once new roots begin to form you know it’s soon time to pot your plant.
*If you leave your clippings in water, they’ll often times have new growth and new leaves form!
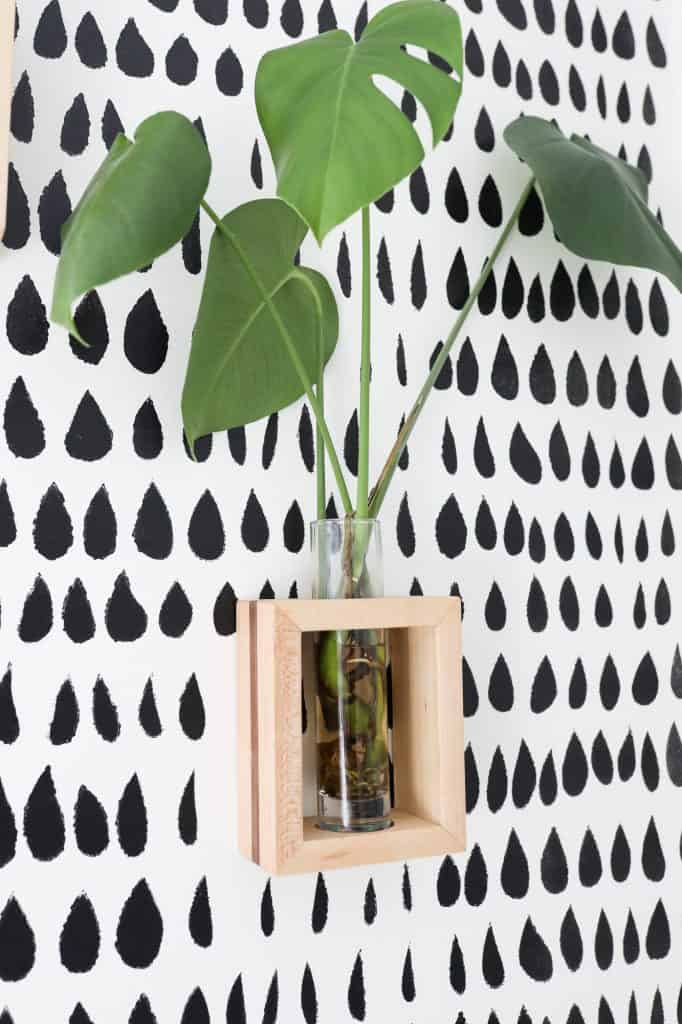
4. Plant Your New Plant
Once you have a handful of roots it’s time to plan them! You’ll want to find a new pot with a drainage hole to ensure the water can drain through and you won’t get root rot. For soil, look for an indoor potting soil as monstera plants like a peaty soil.
Sometimes transferring your monstera from water to soil puts them into a bit of a shock. Be patient with it, especially if it starts to look a little sad. I once had a clipping with just one leaf lose that one leaf only to produce a new leaf a few weeks later. Give it time to acclimate!
Propagating in Soil
If water isn’t your thing, you can place it directly into soil! Placing it in soil will also allow the roots to grow – you just won’t be able to see them grow.
The process of soil propagation often takes a bit longer for it to produce roots (although you won’t be able to see them!) but it will prevent any shock that the plant could go through when transferring it from water to soil.
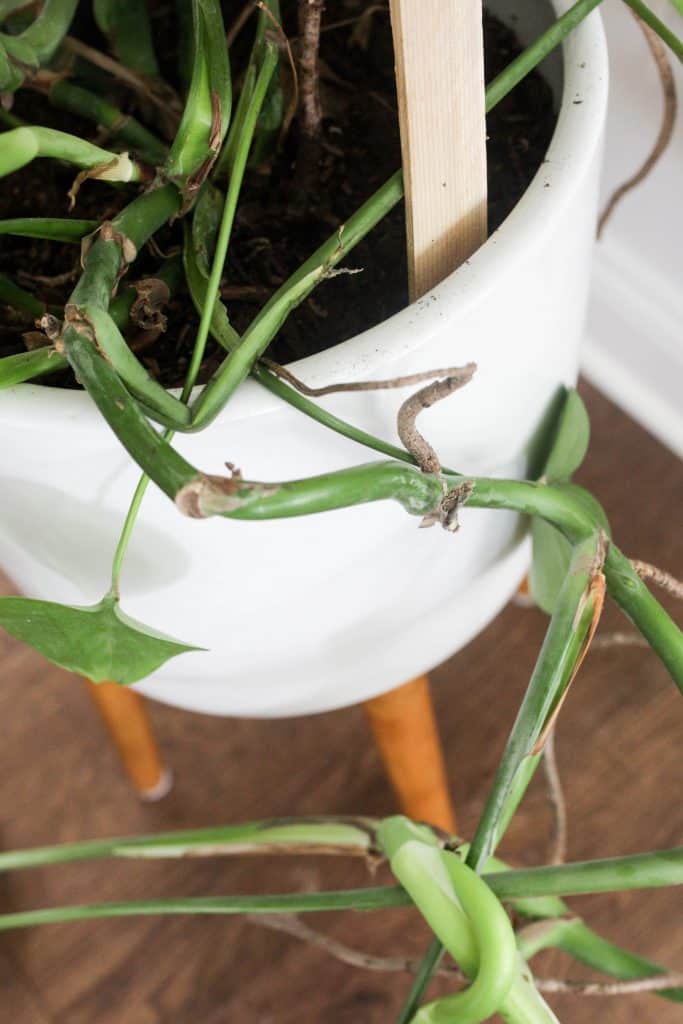
Propagation by Separation
If your monstera plant is nice and large and busting out of its pot, you can try propagating by separation! This is simply the process of cutting off part of the plant away from the main plant so you’re left with 2 plants rather than just one.
To do this method, first you’ll want to water it. Whenever you repot a plant or propagate it, a thorough watering will help it to have enough nutrients to survive the shock of a new pot or being propagated.
Next, you’ll want to take the plant out of the pot. The bigger the plant the harder this step will be. It’s a good idea to do this outdoors.
After your plant is out, now is the time to separate it! Take share shears or a sharp knife and cut away the roots from the main plant.
Be very careful when you do this you don’t damage leaves or the stem. Then repot them! Just make sure that your pot isn’t too big for your plant. You only want an extra 3-6 inches around your plant.
Propagation by Air Layering
Air layering is another way to propagate monstera plants. I will say, the other two are seemingly much more simple to do but this way will still get the job done!
Air layering is getting roots to grow while the baby plant is still attached to the mother plant. Sounds wild, doesn’t it?
What you’ll need to is first, pick up some sphagnum moss or pearlite or a mix of the two. This is essential to growing roots.
Next you’ll want to find a spot that has a nodes just like you would when clipping. It’s actually best if you have 2 nodes in close proximity to one another. If there are any aerial roots around your node simply cut them off so they don’t get in the way.
Next is the trickiest part! You need to cover the nodes with your sphagnum moss. One of the easiest ways to do this is to fill a plastic bag with your sphagnum moss. If you don’t have a plastic bag, you can use plastic wrap. You basically need a way to hold the sphagnum moss next to your nodes.
So regardless of whether you use plastic wrap or a plastic bag, you’re going to next, wrap the nodes so they are completely covered by the sphagnum moss.
Feel free to cut up the bag as needed in order to fully cover the nodes. Once they’re covered, you’ll want to secure the bag to the monstera stem so it doesn’t fall off. Use twine, rubber bands or whatever you can to secure it.
Be sure to leave a little opening so you can mist the sphagnum moss to keep it damp. Don’t keep it too wet though so the roots don’t start to rot. Poking holes in your bag will allow excess water to be released.
After a few weeks you’ll see root development. Once roots form you can cut away the rooted section of your plant and pot it!
Now that you have a freshly propagated monstera, let’s talk about caring for it!
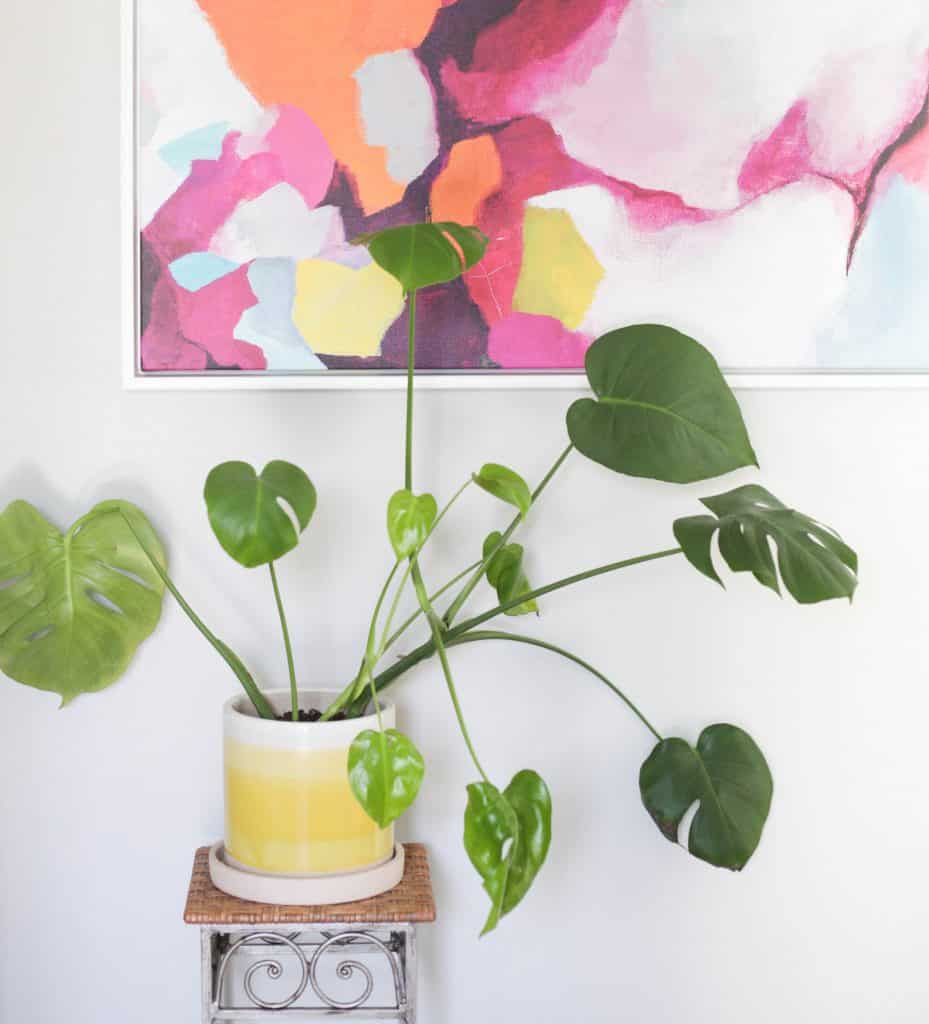
Basic Monstera Plant Care
These plants are great for beginners! They’re incredibly hardy even if you’re someone who is new to plants and just learning. I have a post on how to care for a monstera here with tons of information on how to have a healthy monstera but below is general information to get you started.
Monsteras do best with a good amount of bright, indirect light. They can do fine in low light situations but make sure to not give them too much direct sunlight or the leaves could turn yellow.
When it comes to watering, monstera plants like a good watering about once a week. They don’t like being too wet or too dry so be sure to check on them weekly. Your best option is to put your finger into the top inch of soil to see if it’s wet or dry.
You’ll notice long, brown aerial roots coming off of the main stem of your monstera plant. Monstera plant use these to climb up trees to the top of the canopy when they are in the wild! You’re more than welcome to trim these down if you want to – they don’t entirely need them when grown indoors.
One thing you can do as your plant gets bigger is to stake it up. You can either put a trellis in your pot (like a tomato trellis) and attach the stems to it using plant ties or use a moss pole and attach your plant stems to the pole.
Be sure to head to this post for tons of information on how to care for your monstera here.
And there you have it! Now you know exactly how to propagate your monstera plant. Hopefully this simple tutorial helps you in propagating your monstera with success!
Where can you buy a Monstera where it is not crazy expensive?
I just bought a huge lovely 10″ Monstera at Home Depot for 29.99
I came to this blog from Pinterest. Check Etsy, I saw there are clippings of Monsteras for about five dollars with free shipping.